Tiny beach plum jam

IMG_0348.JPG

I’ve moved! I’m no longer picking and jamming in the Finger Lakes of New York, but in Somerville, MA. I feel super lucky in my new neighborhood, because after only 9 days here, I’ve already made my first batch of local jam.

A really tiny batch of jam, not even filling an 8-ounce jar. But still. If you like jams with a good punch of tartness, this is the jam for you.

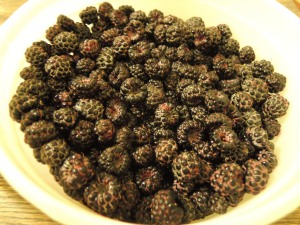
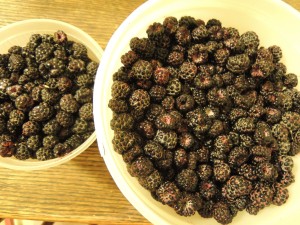
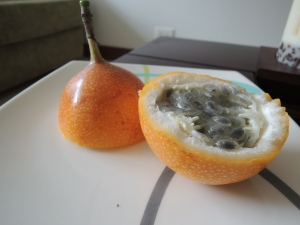
The plums themselves are tiny too–completely round and the size of marbles or Everlasting Gobstoppers. They’re beach plums, found up and down the northeast US near the sea. If you live in the UK or the northwest US, you may find similarly small cherry plums growing wild. I was exuberantly excited to find them here, because I’d once picked beach plums on Martha’s Vineyard and made 8 ounces of the best tart jam I can remember out of them.

These ones are on the unripe side–completely ripe ones will be dark purple–but that’s fine for jam. The beach plums are the small round plums in the pictures below.

IMG_0350.JPG

IMG_0354-0.JPG

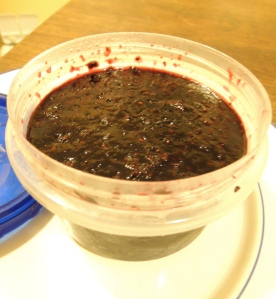
So even though it’s a little ridiculous to make such a small batch of jam, here’s how. It’ll set up very fast, because tart plums are full of pectin and because it’s such a small batch. Mine turned out a gorgeous ruby red color because all the plums I used were red.

IMG_0355.JPG

If you don’t have beach plums, use the tartest plums you can get.

A Tiny Batch of Tiny Plum Jam

Makes less than 8 ounces

Ingredients:
8 ounces small plums (unpitted)
1/4 cup water
About 1/2 cup sugar

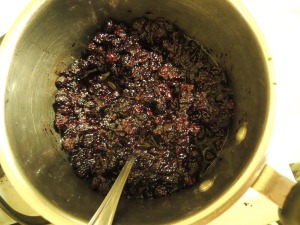
1. Put a small plate in the freezer for later. Wash the plums and put them in a pot with the water. For beach plums, put them in whole. For larger plums, slice them into halves or quarters and remove the pits.

2. Simmer gently, covered, for about 15 minutes or until the plums are totally soft and their skin is wrinkled.

3. Turn off the heat, let the plums cool some, and then remove the pits. You can do this using a food mill, or by pressing the flesh/juice through a colander, but I found with a batch this small that it was easiest just to pick the pits out with my fingers. (Bonus: you feel like a kindergartener finger painting!)

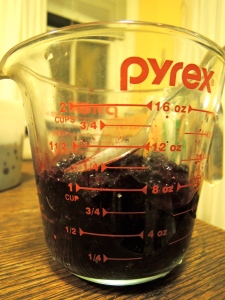
4. Measure the amount of flesh/juice. I got 3/4 cup. Put it back into the pot.

5. For each cup of flesh/juice, add 3/4 cup sugar. So, if you get 3/4 cup flesh like I did, add 1/2 cup sugar.

6. Heat the jam until bubbles form (this won’t take much heat because it’s such a small volume). Cook, stirring, until the jam passes the wrinkle test when a small dab is put on the plate in the freezer.

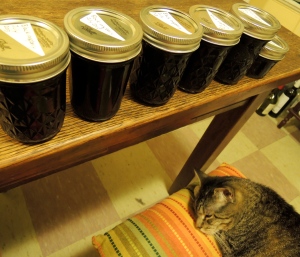
7. Put the jam in a clean jar and store in the fridge.

Red currant sour cream ice cream

red currant ice cream

Today a friend told me they’re starting to get red currants in their fruit CSA and they’re looking for things to do with them. Just the kick in the butt I needed to finally post this recipe. I made it up two summers ago, when I had access to tons of red currants and had finally gotten my fill of eating them fresh.

Red currants are traditionally used for making a clear jelly, but jellies don’t really do it for me–I like my spreads to have more texture. I don’t have this problem with ice cream, however. An ice cream with a swirl of red currant sounded particularly delicious.

Under special request from his mom, my husband had just made Melissa Clark’s Rhubarb Ice Cream with a Caramel Swirl. I’m a sucker for the unadorned, slightly tart taste of plain-dairy-flavored ice creams (sweet cream, yogurt, buttermilk, creme fraiche…), so I was completely taken with the sour cream ice cream base of Melissa Clark’s recipe. I promptly nicked it, added a ribbon of red currants mashed with sugar, and my favorite way to use up red currants was born.

Red Currant Ribbon (sour cream ice cream with a red currant swirl)

Adapted from the ice cream base of Melissa Clark’s Rhubarb Ice Cream with a Caramel Swirl

If you don’t have fresh red currants, you could use pretty much any other berry in their place. I imagine raspberries, strawberries, or blackberries would be delicious.

Ingredients

  • 1 and 1/2 cups whole milk
  • 3/4 cup sugar
  • Pinch of Kosher or sea salt
  • 1 vanilla bean, split and scraped, or 1 teaspoon vanilla extract
  • 4 large egg yolks
  • 1 and 1/2 cups sour cream
  • 1/2 cup red currants (you can use more, probably about up to 1 cup, if you have them)
  • Extra sugar to taste

Methods

1. In a thick-bottomed pot over medium heat, whisk the milk, 3/4 cup sugar, salt, and vanilla bean seeds and pod (or vanilla extract). Simmer gently until sugar dissolves, about 5 minutes.
2. Remove from heat, cover, and steep 30 minutes. Take out the vanilla pod if using (you can dry it and use it to flavor sugar, or steep it in vodka for several weeks to months to make homemade vanilla extract). Return mixture to just barely a simmer.
3. Put the yolks in a large bowl and beat them lightly. Slowly whisk in the hot milk mixture to make a custard.
4. Pour the custard back into the pot and cook over medium-low heat, stirring constantly, until custard is thick enough to coat the back of a spoon, about 5 minutes.
5. Strain through a fine-mesh sieve into a bowl. (If your custard is not visibly lumpy and you are impatient like me, you may skip this.) Whisk in sour cream. Chill at least 3 hours or overnight.
6. Mash red currants with sugar to taste (sweeten it a little more than you would otherwise, because when it’s frozen it will taste less sweet). Chill at least 3 hours or overnight.
7. Churn the custard in an ice cream maker according to the machine’s instructions. When the ice cream looks like it’s a hair’s breadth away from done, pour in the red currant mixture while the machine is running. Turn off the machine after a second or two, so that the red currant mixture is swirled into the ice cream but the swirl remains distinct.
8. Pack the ice cream into containers and store in freezer.

Black raspberry freezer jam

DSCN0916

If you want as much deliciousness with as little effort as possible, freezer jam is the jam for you. I wasn’t even going to post about it, because I made in 15 minutes before a doctor’s appointment and didn’t bother to take pictures. But it was so good.

There’s no canning needed. You don’t even cook the fruit at all. You mash the berries in a measuring cup, and boil the pectin and sugar in a separate pot. Because you cook the pectin and not the fruit, the flavor is incredibly fresh, more like eating freshly picked berries than any other jam. It does need to be stored in the freezer, though.DSCN0930

I used Sure-Jell low- or no-sugar-needed pectin. If you use a different kind of pectin, make sure to get one that works for freezer jam. Then just follow the manufacturer’s instructions for raspberry freezer jam, scaling the recipe down to 2 cups of berries (or whatever amount you have).

Looking for more freezer jam? Serious Eats has some tasty-looking freezer jam recipes for slightly larger batches (about 5 cups).

Black or Red Raspberry Freezer Jam

Yields one 16-oz jar

Ingredients

2 cups black or red raspberries
3/4 cup sugar
12 grams (about 3 1/2 teaspoons) Sure-Jell low-or-no-sugar-needed pectin
1/4 cup water

Directions

1. Using the back of a large spoon, mash the berries in a 2-cup liquid measuring cup.

2. Stir together 3/4 cup sugar and 12 grams pectin in a pot (dry). Add 1/4 cup water, then bring to a boil and boil for 1 minute, stirring constantly.

3. Immediately stir the pectin mixture into the berries.

4. Pour into a clean freezing-friendly container (leave a bit of space at the top, because it will expand in the freezer). Let the jam sit at room temperature until it sets, refrigerate for 24 hours, and then freeze. If not frozen, it will keep in the refrigerator for a couple of weeks.

Blackcurrant scones

DSCN1307


Scones are the best. I am not a morning person, but knowing there’s a batch of scones waiting for me makes getting up actually pretty enjoyable. I like my scones buttery, flaky, and only a little bit sweet. These are currently my favorite.

Currant scones are pretty common, and they’re tasty enough. These scones aren’t any of those currant scones you’ve had before. Currant scones are usually made with dried currants, which are… actually raisins. Not currants at all! What a cheat!

Last year I lucked into a large supply of blackcurrants and I’ve been making these scones all winter and eagerly awaiting blackcurrant season so I could share the recipe with you.

Blackcurrants are strongly flavored, wine-y and too tart for most people to eat out of hand. In the oven, they explode into small gooey pockets, like little dabs of blackcurrant jam.

I do realize it’s 87 degrees out. You don’t have to make these now. All you have to do is:

1. Go out and get your hands on some blackcurrants.

2. Measure them out into freezer bags, 3/4 cup of blackcurrants in each bag, and freeze.

3. When you feel like baking again, take out a bag and use it for one recipe of scones.

DSCN1286

This scone recipe is adapted from the fantastically detailed Bread Bible by Rose Levy Berenbaum. The original calls for the dried-raisin kind of currants, so I’ve substituted fresh or frozen blackcurrants (frozen actually work better, since they don’t squoosh when you’re rolling out the dough), and I streamlined the recipe a bit because I am not patient.

The scones are delicious, and naturally they go very well with blackcurrant tea.

DSCN1282

DSCN1283

DSCN1288DSCN1289

DSCN1290

DSCN1291

DSCN1292

DSCN1308

Blackcurrant scones

Adapted from Flaky Scones in The Bread Bible by Rose Levy Berenbaum

Makes about 12 scones

Ingredients

  • 1/2 cup (1 stick) unsalted butter, cold
  • 1 cup whole wheat pastry flour (if you don’t have this, you can use all white flour)
  • 1 cup plus 2 tablespoons white all-purpose flour
  • 1/4 cup sugar (or up to 1/2 cup if you like your scones sweeter)
  • 1 tsp baking powder
  • 1/4 tsp baking soda
  • 1/4 salt
  • 1 cup heavy cream
  • 3/4 cup fresh or frozen black currants

Methods

  1. Preheat oven to 400 degrees F.
  2. Cut the cold butter into 1/4-inch thick slices with a sharp knife.
  3. In a large bowl, whisk together flour, sugar, baking soda and powder, and salt.  Add butter, and cut in with a pastry blender until the pieces are about 1/2 inch in diameter. Then, using your fingers, flatten out the butter pieces to large flakes. Mix in the buttermilk or cream just until the flour is moistened and begins to form large clumps. Using your hands, form the dough into a ball.
  4. Flour a counter or tabletop and turn the dough out onto it. Lightly flour the top of the dough and a rolling pin.  Roll the dough into a rectangle about 1/2 inch thick and about 8 by 12 inches. Arrange the dough rectangle so that, if it was a print job, it would be Landscape, not Portrait.
  5. Place the blackcurrants on the bottom half of the dough. Press in gently. Fold the top half of the dough down over the blackcurrants.
  6. Roll out the dough one final time into a 1/2-inch thick, approximately 4 by 14 inch rectangle.  Make alternating diagonal cuts in order to form triangular scones.  Place scones about 1 inch apart on a rimmed cookie sheet lined with parchment paper (scones will rise, but will not spread).
  7. Bake for 15–20 minutes or until scones are lightly brown at the edges. Check the scones after 10 minutes to see if they are baking evenly, and if not, rotate the baking sheet. When done, transfer and cool on wire racks. The finished scones freeze well, too.

Black raspberry jam

DSCN0912

I will be brief. This jam is superb. I’ve never made black raspberry jam before, and I’m seriously planning to make it every year from now to ever. It has the dark, slightly wine-y taste of true blackberries without their mustiness; it has the tang and sprightliness of red raspberries too. It is rare and delicious.

It did require picking a lot of wild black raspberries, and I have the thorn scratches to prove it.

DSCN0911

In total, I used 12 cups of berries for the jam: the recipe calls for 6 cups of mashed berries, and I found that I needed 2 cups of fresh berries to get 1 cup of mashed.

DSCN0915DSCN0916

It’s pretty simple jam, just four ingredients: black raspberries, sugar, lemon, and pectin. You could even leave the pectin out and just cook your jam longer, if you don’t mind a less firm set.

DSCN0920

I decided to remove some of the seeds by passing about a third of the jam through a food mill. If I were making this jam just for myself, I probably wouldn’t bother, especially not this year when we’ve gotten a lot of rain so the black raspberries are big and juicy. But I want to give some as presents, and I know not everyone enjoys as many seeds in their jam as I do.

When I was finished I wanted to eat jam off of all the pots and spoons, and I ate buttered toast with black raspberry jam for lunch.

Our cat is very impressed with all the work I’ve done.DSCN0924

Jam of the Gods (Black Raspberry Jam)

Slightly adapted from Food in Jars

Yields 5 half-pints and 1 quarter-pint jar

The recipe below has minimal canning instructions. If you’re new to canning, Food in Jars just did a really nice post on the basics. Actually, even if you’re not new to canning, it’s worth a look; I learned quite a bit (like how high to fill your boiling water bath so it doesn’t overflow later).

Ingredients
6 cups mashed black raspberries (12 cups unmashed) (equal to about 4 pints or 3 pounds)
3 cups sugar
Juice and zest of 1 medium lemon (juice = about 1/4 cup)
2 tablespoons powdered pectin (I used Sure-Jell low- or no-sugar pectin; 2 Tbs is less than one box)

1. Set out all of your canning equipment. Prepare your jars and start the boiling water bath heating up. Put a small plate or saucer in the freezer (for the wrinkle test–see step 5).

2. Measure 6 cups mashed berries. Combine in pot with sugar and lemon juice and zest. Bring to a boil while stirring. Cook until the mixture is thin and runny and the berries have started to fall apart.

3. Run one-third to one-half of the mixture through a food mill (I did one-third). Recombine with the rest of the jam. (If you don’t mind seediness, you can skip this step.)

4. Continue boiling the jam, stirring constantly, until it starts to thicken a little. Stir in the pectin.

5. Cook for roughly 5-9 minutes (the timing will depend on the width of your pot, among many other things), until the jam passes the wrinkle test when you put a little on the plate in the freezer (see Step 7 of this recipe for the wrinkle test).

6. Remove the jam from heat and ladle into clean jars. Apply lids and bands and process in a boiling water bath for 10 minutes (start your timer when the water reaches a full boil after you’ve added the jars). Remove and let cool.

7. When the jars are completely cool, you can test the seals by removing the bands from the jars and lifting them up an inch just by holding the edges of the lid. If the lid stays on, the seal is good. Sealed jam will keep for at least a year. Keep any unsealed jam in the refrigerator–it will keep for several months.

DSCN0921

Berry season

DSCN0889

We are at a critical juncture, my friends. A critical, tasty juncture. One berry season is beginning, and another is at its tail end.

A few days ago, the season for black raspberries began; they’re also known (around here) as blackcaps. Rubus occidentalis is the species we have in the northeast: they’re the shape of raspberries but black when ripe, and smaller, seedier, and tastier than true blackberries. Oh, you can argue for blackberries, but blackcaps are my favorite non-tropical fruit, so you won’t persuade me. They taste like summer. You can’t get them out of season. You can sometimes find them for sale at farmer’s markets, but mostly you have to pick them yourself, and eat them warm from the sun with purple stains on your fingers, a sprinkling of thorn scratches on your arms, and a great sense of satisfaction.

Go out and pick some. You’ll find them in ditches, and on the edges of fields and woods. Drive slowly around on country roads looking for a flash of black berries or of whitish undersides of leaves. It’s a good year for them, in the Finger Lakes area anyway (the rain we’ve been getting has made them bigger and less seedy). I think I’ve got enough to make a batch of jam.

DSCN0876

And while black raspberries are going into full swing, the season for serviceberries, also called juneberries, is just ending. You can probably still find some to eat in the next few days, depending on the tree. A serviceberry tree looks like this:

DSCN0877

Serviceberries taste like mild blueberries and contain tiny seeds that give them a hint of almond flavor. When ripe, they’re a dark blue-purple. I usually eat them out of hand, or add them to smoothies or oatmeal, but you could probably use them any way you would use blueberries.

DSCN0879

They’re a perfect berry for urban foraging, because the trees are often planted as ornamentals. (Birds love them, too.) This public Google Map of edible fruit in the Ithaca area includes a bunch of serviceberry trees and also a black raspberry patch. Add more trees to the map if you find any!

Colombian fruit, of the dragon and passion varieties

Aside

DSCN0260

What is this scaly-looking yellow thing? It’s a fruit of the dragon variety!

Today: dragon fruit and passion fruit, or Part II of Eating My Way Through the Tropical Fruits of Colombia. During lunch on Wednesday, I looked up to find snow/freezing slush pelting against the window, so it seems a good time to remind myself that I was recently someplace very warm, and it will soon be very warm again. Although even then, Ithaca will not be growing any of these:

DSCN0572

This wrinkled little beauty is a maracuya, the second kind of passion fruit I tried in Colombia. While the granadilla I mentioned in my recent post is sweet, the maracuya is sour and makes a REALLY excellent juice. The seeds were also excellent stirred into  lightly sweetened plain yogurt for breakfast (the yogurt came in small plastic milk-jug-shaped bottles, white with blue writing, although I don’t remember anything so useful as a brand name). My friend, our host, said she finds them too sour for eating out of hand, although if you like sour things it would probably be right up your alley. The goo around the seeds (mmm, appetizing, no?) is orange:

DSCN0573

When selecting a passion fruit, you don’t need to hold out for a nice smooth, unwrinkled one. Actually, wrinkles are good: they mean it’s ripe. Which brings me to the third kind of passion fruit I tried:

DSCN0379

So, I was warned. My friend said these weren’t ripe, and I went ahead and bought one anyway, because I wanted to try as many kinds of fruit as I could! And it was fuzzy! And about the size, shape, and color of a pickling cucumber! So appealing.

Anyway, this is a curuba, or banana passion fruit. They are supposed to be yellow when ripe (and yes, slightly fuzzy, that’s normal). If you try to eat them when they’re green, like I did, they’ll be inedibly sour. But pretty! Presumably they are tasty when actually ripe.

And finally, getting back to the odd yellow football at the top of the post:

DSCN0261

This one is not a kind of passion fruit, it’s a pitahaya, or dragon fruit. They grow on cacti in the genus Hylocereus and I really just did not understand their appeal until I ate one in Colombia. US grocery stores sometimes sell a hot pink variety, and Trader Joe’s even sells dried dragon fruit slices; the fresh ones I’ve had were watery and tasteless, and the dried ones were crunchy and tasteless. Someone brought the dried ones on a hike, and we all agreed that it was like chewing on cardboard.

But! This one in Colombia was good. I cut it in half and we scooped out the flesh with a spoon (don’t eat the yellow skin). The seeds were crunchy and a little bit nutty, and the fruit tasted almost exactly like a peeled red seedless grape: sweet, juicy, and crisp. Not the most remarkable taste, but good, and its unusual appearance made it pretty fun to eat.

How about you? Have you ever tried dragon fruit? Anyone want to contradict my harsh judgement of US dragon fruits as completely tasteless?

What to eat for breakfast in Colombia

DSCN0313

You don’t really need to read this post, just, if you find yourself in Colombia for breakfast, eat these. Eat as many of them as you can.

OK, let’s back up. I just spent 10 days in and around Medellín, Colombia. I ate as many varieties of tropical fruit as I could get my hands on, naturally, as a public service to you so I could tell you all about them.

DSCN0316

This is a granadilla. It’s a sweet variety of passionfruit with a hard, orange-spotted shell. They look like… space maracas? Dinosaur eggs? Very cool, is what I’m saying. And they taste amazing too.

Most passionfruits (more on them later) are a little sweet and a lot sour. Granadillas are not sour at all. Apparently in Colombia they’re a popular fruit for kids’ lunch boxes, because they’re sweet, easy to like, and easy to crack open with your fingers (no utensils needed) and eat with minimal mess.

The edible part of the granadilla includes the black seeds, which are crunchy, and the clear juicy pulp surrounding the seeds. A granadilla tastes like a passionfruit with most of the sourness removed. The outer orange shell and the foamy white layer lining the shell are not edible (that I know of).

DSCN0315

It has cool little white tubules connecting each individual seed to the inside wall of the fruit!

And the breakfast part was a bit misleading. They are also good for lunch, dinner, elevensies, tea, the meal indicating recovery from paragliding-induced motion sickness, and any time at all, really.

DSCN0039

How to cut a mango

In case my last post inspired you to go out and buy a mango, here’s how to cut one.

For some reason I always used to cut mangoes in four pieces and then try to slice/pry each piece off of the pit. This was squishy and difficult. Maybe I am the only one who cut mangoes the hard way for most of my life, and you already know how to do this, but in that case you can just enjoy the pictures of tasty, tasty mango.

You’ll need a thin, sharp knife and a mango.

First, stick the knife into the mango like this to see how deeply you can cut into the mango before you’ll hit the seed. Often it’s farther than I think.

Then, slice off the first side to the depth that you’ve already determined.

It’ll come out looking something like this, with maybe a bit of the seed showing. (This is good; it means you cut as close as possible and got as much delicious mango off the seed as you could.)

Cut the second side the same way.

Now it’s a bit hard and you’ll get juice on your hands, but you can gently but firmly hold the mango seed between your thumb and forefinger (it will squish a little probably) while you cut off the flesh around the rim of the seed.

You can score the big mango pieces into fancy-looking little squares like this. Ian is totally responsible for this picture; I don’t normally bother cutting them into such small and pretty pieces.

Then there’s always some mango pulp that you can’t cut off the seed. Not pictured, but the most fun: Messily eating this off the seed, with mango juice all over my fingers and face.

A better mango

Mangoes are my favorite fruit, so this is important.

Guys, I found a new and better kind of mango.

It’s called a Kiett mango. Completely green even when fully ripe (as you can see above), Kiett mangoes have a great flavor, sweet and a little tangy, and are completely un-stringy. One was clearly not a large enough sample size, so I tried three of them (two from the Ithaca Wegmans and one from the Geneva Wegmans).

But what do I mean, a better mango? The iconic mango, the one you probably think of when you think ‘mango’ if you live in the U.S., is the Tommy Atkins. To me this always sounded more like the name of a grenade or a WWII infantryman than the name of a fruit. It turns out it is actually the term for a common soldier in the British Army, but the fruit is named after Thomas Atkins, who found the mango on his land in Florida. The mango is big and has a nice color, either red or a mixture of green and red, like this:

Tommy Atkins mangoes were a treat when I was growing up, and I ate them for years and years and years, and loved them. They were the only mangoes I had ever eaten. It turns out, though, that they’re kind of the red delicious apples of the mango world. They’re a nice color, easy to ship, and disease resistant, but their taste isn’t great and they’re very fibrous and stringy.

So then I discovered Ataulfo mangoes (Champagne mangoes are a kind of Ataulfo). Often sold in NYC at supermarkets and bodegas, they’re smaller, flattened, and yellow. They have a creamy, fiberless texture. They taste much better than Tommy Atkins and are easier to eat. But even so, they’re very sweet, hardly tangy at all. Here’s an Ataulfo mango on the left and a Kiett mango on the right:

Kiett mangoes are a good middle ground: tangy like a Tommy Atkins, but with a much better flavor and the smooth texture of an Ataulfo. At least, they’re the best I’ve found so far in New York State.

See if you can find any Kiett mangoes! Their season (in California, where they are grown) is August until late October. I got mine in mid-October, and last week the Ithaca Wegmans said they were trying to get more.